> ## Documentation Index
> Fetch the complete documentation index at: https://docs.replit.com/llms.txt
> Use this file to discover all available pages before exploring further.
# App Storage
> Learn how to use App Storage to host and manage file uploads like images, videos, and documents.
App Storage is Replit's built-in object storage that lets your app easily host and save uploads like images, videos, and documents.
Buckets are containers for storing objects such as files. They include access policies to limit what actions users or applications can perform on their contents.
**Object Storage** is now called **App Storage**.
With App Storage, you can build apps like:
* **Photo sharing platforms**: Let builders upload, store, and display images
* **Video streaming services**: Handle video uploads and serve content to viewers
* **Document management systems**: Store and organize builder files with secure access
* **Portfolio sites**: Showcase work with media files that load reliably
* **File backup services**: Provide builders with cloud storage for their important files
Ask **Agent** to add App Storage to your app with details on what types of files your app should handle. Agent will set up the integration, create the necessary buckets, and update your app to upload, store, and retrieve files with advanced features like authentication and access controls.
The App Storage tool lets you share data between the development and production environments of the same Replit App.
Each bucket belongs to one project and cannot be shared across apps.
## Features
App Storage is powered by Google Cloud Storage (GCS).
This means you receive the benefits of industry-leading uptime,
availability, and security.
App Storage provides the following features for your Replit Apps:
* **Persistent cloud storage**: Store files that remain accessible to your published app and users
* **Scalable file handling**: Handle growing data needs without worrying about storage limits
* **Programmatic access**: Upload, download, and manage files using intuitive APIs
* **Enhanced Agent integration**: Let Agent set up App Storage with advanced configurations, inspect existing setups, and generate complete backend and frontend code with authentication and access controls
Here are a few ways you can use App Storage in your Replit Apps:
* Store builder profile pictures and media uploads
* Serve product images for e-commerce sites
* Handle document uploads for form submissions
* Create file sharing and collaboration features
* Build content management systems with media libraries
**Enhanced Agent Integration**: You can prompt [Replit Agent](/features/agent/overview) to automatically add App Storage to your apps! Agent can now set up object storage, inspect configurations, and generate complete backend and frontend code with advanced features like authentication and access controls. Simply mention "App Storage" or "file storage" in your prompt.
Add App Storage to my app to store files
Create a photo gallery app with App Storage for images
Set up App Storage with authentication for user file uploads
Learn more about [Agent integrations](/features/integrations/overview#data-storage--management) and see all available App Storage prompts.
## Usage
Your Replit App must authenticate with Google Cloud Storage to access a bucket and its objects.
Use the official Replit App Storage client libraries to automatically authenticate.
You can access the App Storage tool directly in your Project Editor.
From the left **Tool dock**:
1. Select  **All tools** to see a list of Project Editor tools.
2. Select
**All tools** to see a list of Project Editor tools.
2. Select  **App Storage**.
From the **Search bar**:
1. Select the
**App Storage**.
From the **Search bar**:
1. Select the  magnifying glass at the top to open the search tool.
2. Type "App Storage" to locate the tool and select it from the results.
To associate a new storage bucket with your Replit App, create a bucket.
From the **App Storage** tool:
1. Click on **Create new bucket**.
2. Enter a name for the bucket in the **Name** field and select **Create bucket**.
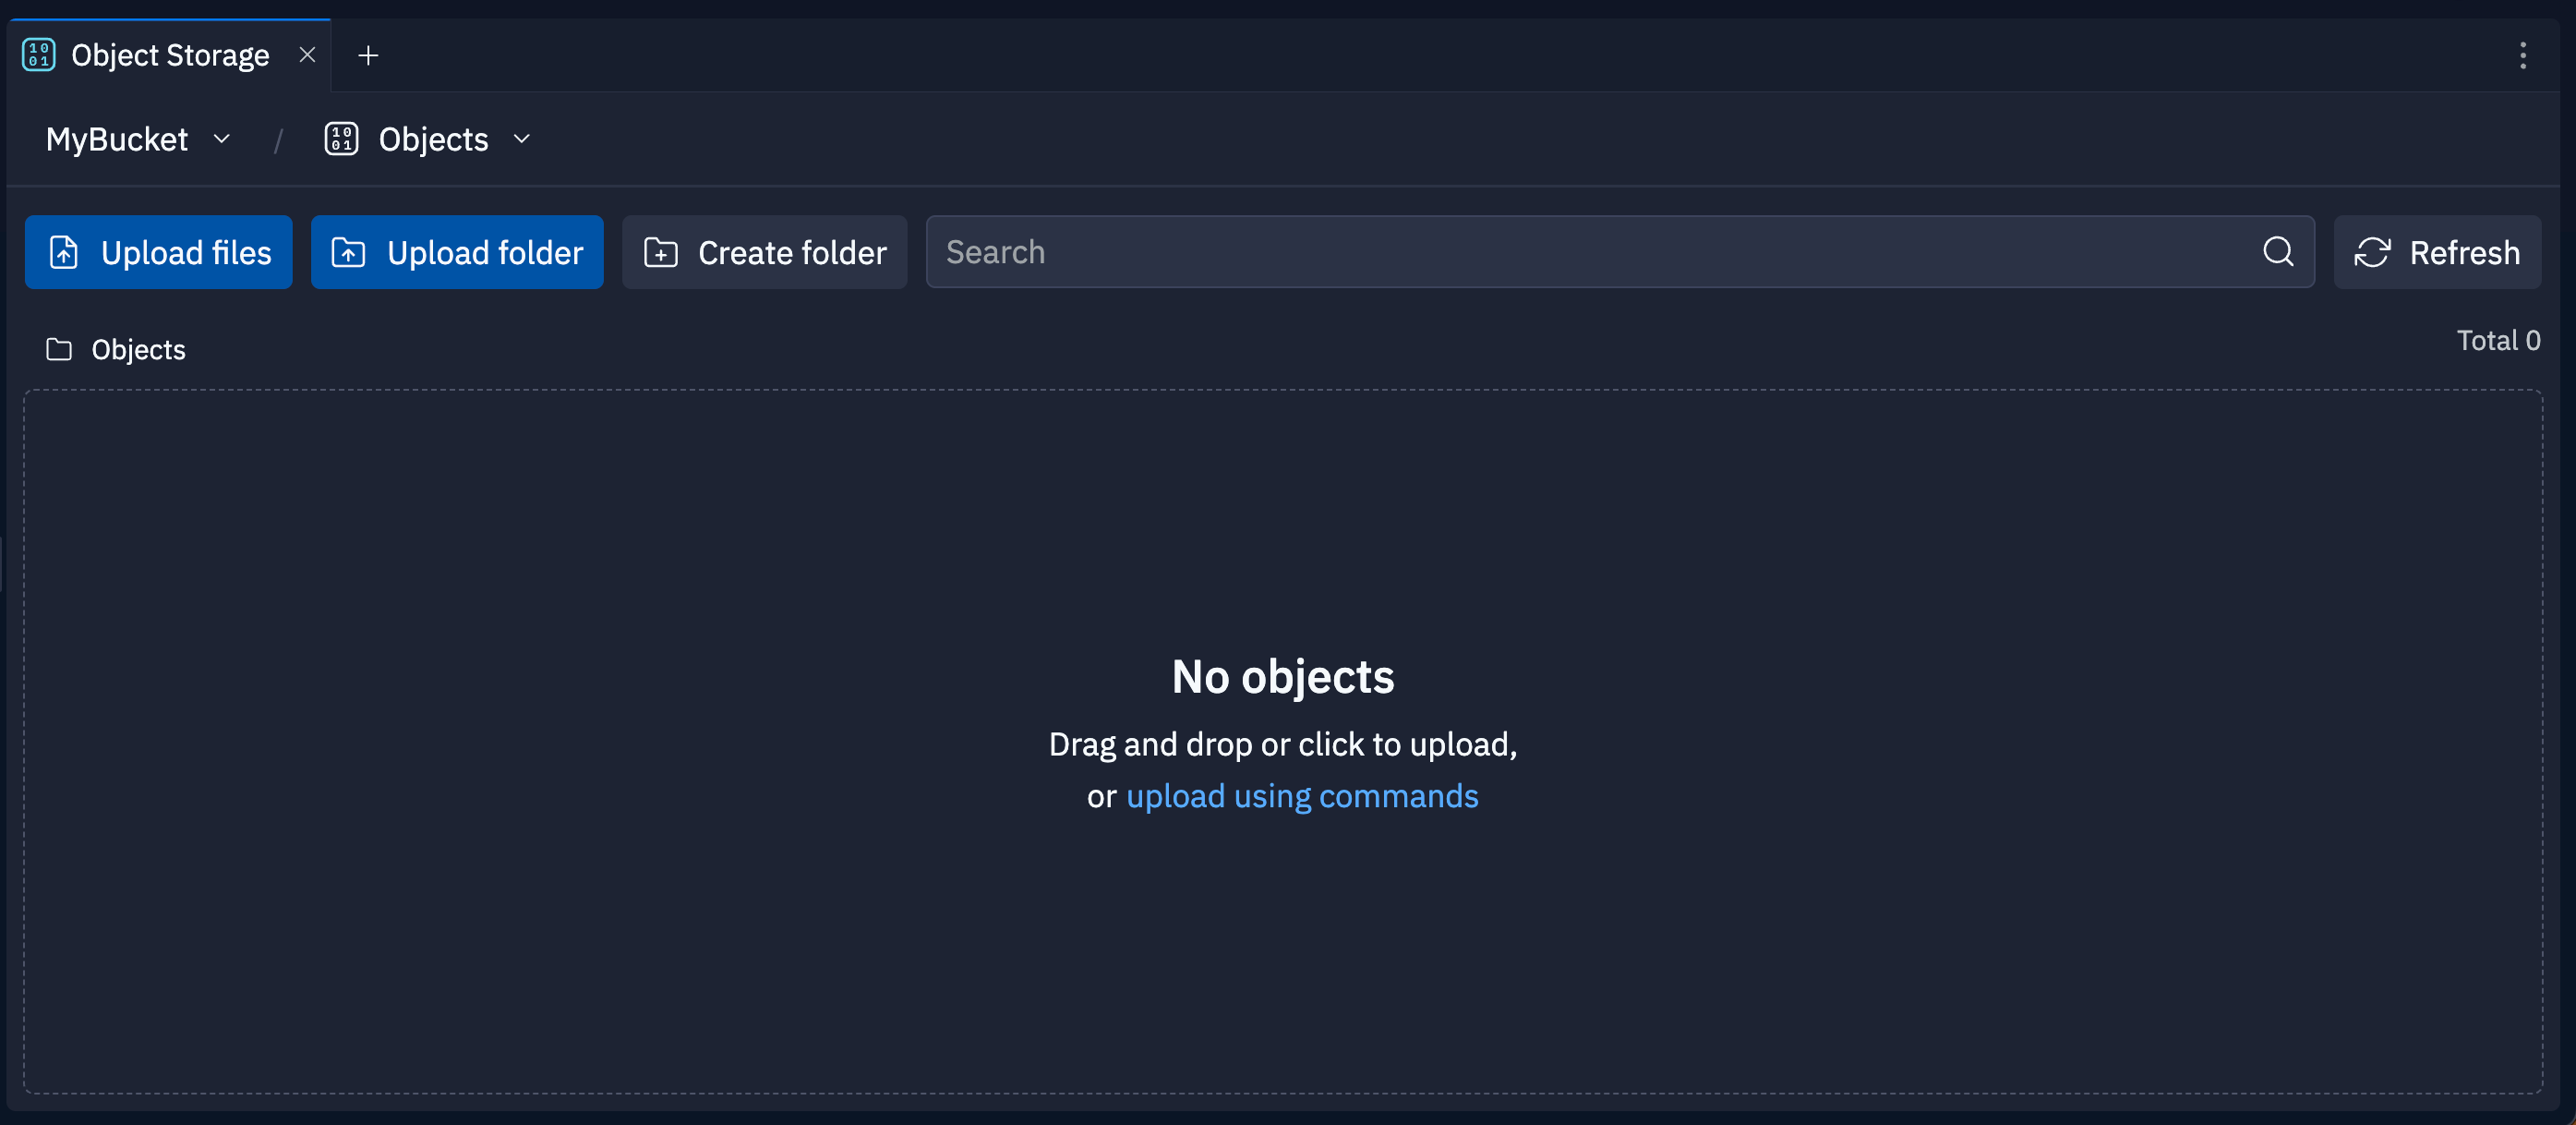
The App Storage tab should resemble the following screenshot:
magnifying glass at the top to open the search tool.
2. Type "App Storage" to locate the tool and select it from the results.
To associate a new storage bucket with your Replit App, create a bucket.
From the **App Storage** tool:
1. Click on **Create new bucket**.
2. Enter a name for the bucket in the **Name** field and select **Create bucket**.
The App Storage tab should resemble the following screenshot:
 To create additional buckets, open the bucket dropdown menu on the top left of the **App Storage** tab and select **Create new bucket**.
The following sections explain the bucket and object management options in the App Storage tool.
### Select a bucket
To switch between your project's storage buckets, select the dropdown menu in the top left corner of the **App Storage** tab.
The selected bucket displays a check mark next to its name.
### Access the bucket ID
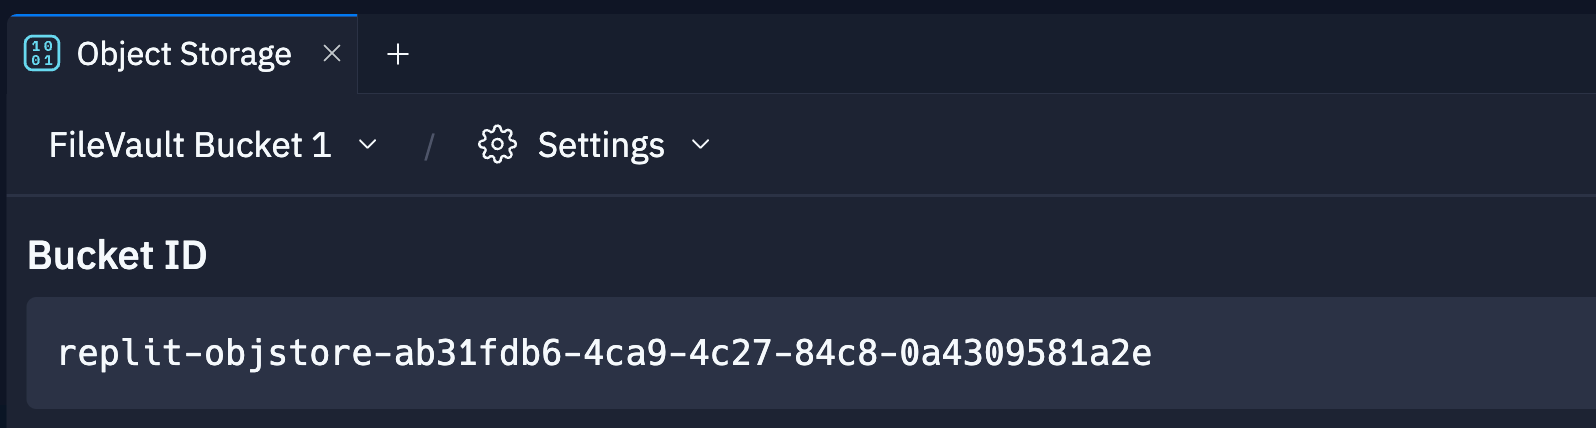
To view the **Bucket ID** by selecting the **Settings** view from the dropdown at the top of the **App Storage** tab.
The Bucket ID uniquely identifies the bucket, which your code must reference to perform an operation.
If you have multiple buckets, select the correct bucket from the dropdown menu in the top left corner.
The following screenshot shows the Bucket ID for the "FileVault Bucket One" bucket:
To create additional buckets, open the bucket dropdown menu on the top left of the **App Storage** tab and select **Create new bucket**.
The following sections explain the bucket and object management options in the App Storage tool.
### Select a bucket
To switch between your project's storage buckets, select the dropdown menu in the top left corner of the **App Storage** tab.
The selected bucket displays a check mark next to its name.
### Access the bucket ID
To view the **Bucket ID** by selecting the **Settings** view from the dropdown at the top of the **App Storage** tab.
The Bucket ID uniquely identifies the bucket, which your code must reference to perform an operation.
If you have multiple buckets, select the correct bucket from the dropdown menu in the top left corner.
The following screenshot shows the Bucket ID for the "FileVault Bucket One" bucket:
 ### Upload or download objects
To upload an object to the selected bucket:
1. Navigate to the **Objects** view in the **App Storage** tab.
2. Select
### Upload or download objects
To upload an object to the selected bucket:
1. Navigate to the **Objects** view in the **App Storage** tab.
2. Select  **Upload files**, or
  **Upload folder** to upload all files from a folder.
Then, select one or more files to upload from the file dialog.
Alternatively, drag a file or folder into the area that lists the contents of the bucket.
To download an object from the selected bucket:
1. Navigate to the **Objects** view in the **App Storage** tab.
2. Select the
**Upload folder** to upload all files from a folder.
Then, select one or more files to upload from the file dialog.
Alternatively, drag a file or folder into the area that lists the contents of the bucket.
To download an object from the selected bucket:
1. Navigate to the **Objects** view in the **App Storage** tab.
2. Select the  download icon to the right of the file to download it.
### Organize objects in folders
To create a folder in the selected bucket:
1. Navigate to the **Objects** view in the **App Storage** tab.
2. Select
download icon to the right of the file to download it.
### Organize objects in folders
To create a folder in the selected bucket:
1. Navigate to the **Objects** view in the **App Storage** tab.
2. Select  **Create Folder** in the **Objects** view.
3. Enter a name for the folder.

To add objects to a folder in the **Objects** view, drag an object to the destination folder.
To move the object to a parent folder, drag it above the header to the name of the folder above the object list.
The following animation shows moving the "product\_demo.mov" file from the "videos" folder to the parent "Objects" folder:
**Create Folder** in the **Objects** view.
3. Enter a name for the folder.
To add objects to a folder in the **Objects** view, drag an object to the destination folder.
To move the object to a parent folder, drag it above the header to the name of the folder above the object list.
The following animation shows moving the "product\_demo.mov" file from the "videos" folder to the parent "Objects" folder:
 ### Delete objects or buckets
The delete action is irreversible. Make sure to back up any essential data before proceeding.
To delete an object forever:
1. Navigate to the **Objects** view in the **App Storage** tab.
2. Select the
### Delete objects or buckets
The delete action is irreversible. Make sure to back up any essential data before proceeding.
To delete an object forever:
1. Navigate to the **Objects** view in the **App Storage** tab.
2. Select the  trash icon
next to the object you want to delete.
3. Confirm the deletion in the confirmation dialog.
To delete a bucket and all the objects it contains:
1. Navigate to the **Settings** view in the **App Storage** tab.
2. Make sure you select the bucket you want to delete in the top left bucket dropdown menu.
3. Select **Delete Bucket**.
4. Confirm the deletion in the confirmation dialog.
### Bucket access management
Each App Storage bucket is exclusive to the project where you create it.
You cannot attach that bucket to another project, even if both projects belong to the same account.
To use App Storage in another project, create a separate bucket in that project's **App Storage** tool.
### Programmatic access to App Storage
To access App Storage from your Replit App, use one of the following libraries:
* Replit App Storage SDK, available for JavaScript and Python
* Google Cloud Storage client library
For instructions on how to use the client libraries, see the following resources:
* [JavaScript App Storage SDK](/features/sdks/object-storage-javascript-sdk/): Client reference for the JavaScript SDK
* [Python App Storage SDK](/features/sdks/object-storage-python-sdk/): Client reference for the Python SDK
* [Google Cloud Python SDK example app](https://replit.com/@matt/GCS-Python-Uploads?v=1): Remix this app to manage objects using the Google Cloud Python SDK
## Billing and resource usage
To monitor your App Storage usage, navigate to the Usage page.
To learn more about App Storage pricing, see [App Storage Billing](/billing/object-storage-billing).
trash icon
next to the object you want to delete.
3. Confirm the deletion in the confirmation dialog.
To delete a bucket and all the objects it contains:
1. Navigate to the **Settings** view in the **App Storage** tab.
2. Make sure you select the bucket you want to delete in the top left bucket dropdown menu.
3. Select **Delete Bucket**.
4. Confirm the deletion in the confirmation dialog.
### Bucket access management
Each App Storage bucket is exclusive to the project where you create it.
You cannot attach that bucket to another project, even if both projects belong to the same account.
To use App Storage in another project, create a separate bucket in that project's **App Storage** tool.
### Programmatic access to App Storage
To access App Storage from your Replit App, use one of the following libraries:
* Replit App Storage SDK, available for JavaScript and Python
* Google Cloud Storage client library
For instructions on how to use the client libraries, see the following resources:
* [JavaScript App Storage SDK](/features/sdks/object-storage-javascript-sdk/): Client reference for the JavaScript SDK
* [Python App Storage SDK](/features/sdks/object-storage-python-sdk/): Client reference for the Python SDK
* [Google Cloud Python SDK example app](https://replit.com/@matt/GCS-Python-Uploads?v=1): Remix this app to manage objects using the Google Cloud Python SDK
## Billing and resource usage
To monitor your App Storage usage, navigate to the Usage page.
To learn more about App Storage pricing, see [App Storage Billing](/billing/object-storage-billing).